
Needle Roller Bearings play a crucial role in various applications, providing high load capacity with a small footprint. Their cylindrical rollers offer a large surface area in proportion to their size, enabling them to handle heavy radial loads while maintaining compactness. Proper installation is essential to ensure optimal performance and longevity of these bearings. In this comprehensive guide, we’ll walk you through the step-by-step process of installing Needle Roller Bearings with precision and efficiency.
Understanding Bearing Series
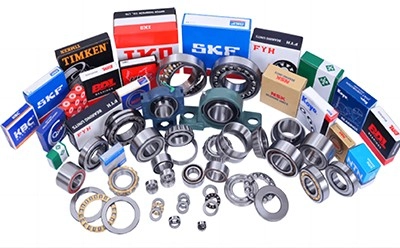
Before delving into the installation process, it’s important to familiarize yourself with the bearing series. Different manufacturers may use varying part numbers for similar bearings. Utilizing a needle roller bearings interchange chart allows for easy cross-referencing of part numbers across brands. This ensures you select the right bearing series for your application, eliminating compatibility issues and simplifying the installation process.
Step-by-Step Guide
- Preparation: Begin by gathering all the necessary tools and equipment for the installation process. Ensure you have the correct Needle Roller Bearings specified for your application. Refer to the interchange chart to confirm the compatibility of the selected bearings.
- Cleanliness is Key: Before installing the bearings, thoroughly clean the mounting surfaces and surrounding area to remove any dirt, debris, or contaminants. Use a solvent or cleaning agent suitable for the application to ensure a clean and smooth surface for installation.
- Inspect Bearings: Before proceeding, carefully inspect the Needle Roller Bearings for any signs of damage or defects. Check for smooth rotation and ensure all components are in good condition. Any abnormalities should be addressed before installation.
- Lubrication: Apply a thin layer of lubricant to the bearing surfaces to reduce friction and prevent premature wear. Use a lubricant recommended by the manufacturer for the specific bearing type and application.
- Positioning: Carefully position the bearings on the shaft or housing according to the manufacturer’s specifications. Take care to align the bearings correctly to ensure smooth operation and proper load distribution.
- Securement: Once the bearings are in position, securely fasten them using the appropriate mounting hardware. Follow the recommended torque specifications provided by the manufacturer to prevent over-tightening or under-tightening.
- Final Inspection: After installation, perform a final inspection to ensure the bearings are properly seated and aligned. Rotate the shaft or housing by hand to check for any abnormal resistance or noise, indicating misalignment or improper installation.
Conclusion
Proper installation of Needle Roller Bearings is essential for optimal performance and longevity. By following this step-by-step guide and utilizing the bearing series interchange chart, you can ensure precise installation and compatibility across different manufacturers. Remember to prioritize cleanliness, inspection, and lubrication throughout the process to maximize the efficiency and reliability of your bearings. With careful attention to detail, you can confidently install Needle Roller Bearings for a wide range of applications, knowing they will deliver exceptional performance under demanding conditions.
Leave a Reply